Accessibility Workshops in August

During the month of August, there are plenty of exciting opportunities to attend virtual workshops covering a variety of digital accessibility topics.

Continue reading for more details and registration links.

Note: All workshops are one hour and limited to Rice faculty, staff, and teaching students.


Workshop: Intro to Digital Accessibility

We will discuss what digital accessibility means at Rice. Learn more about Rice’s legal commitments, Rice’s standard and recommendations, “low-hanging fruit” of accessible design, and more…

Register for one (not a series):


Workshop: Accessible Docs & PDFs

We will discuss best practices and strategies for creating and remediating accessible Word documents.  We’ll also review a workflow for converting them into accessible PDFs.

Register for one (not a series):


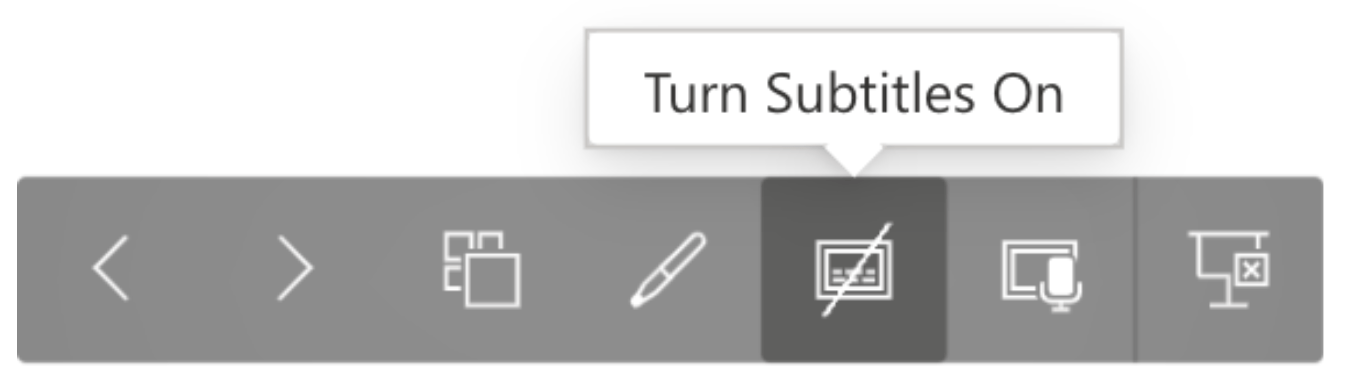
Workshop: Better Closed Captions

Learn more about the best practices of using automatic speech recognition (ASR) captions and caption editing.

We will discuss of options for live (synchronous) and recorded (asynchronous) closed captions using video applications like Zoom, Google Meet, and Kaltura. We’ll also look at presentation applications like PowerPoint 365 and Google Slides, which have integrated ASR captions.

Register for one (not a series):


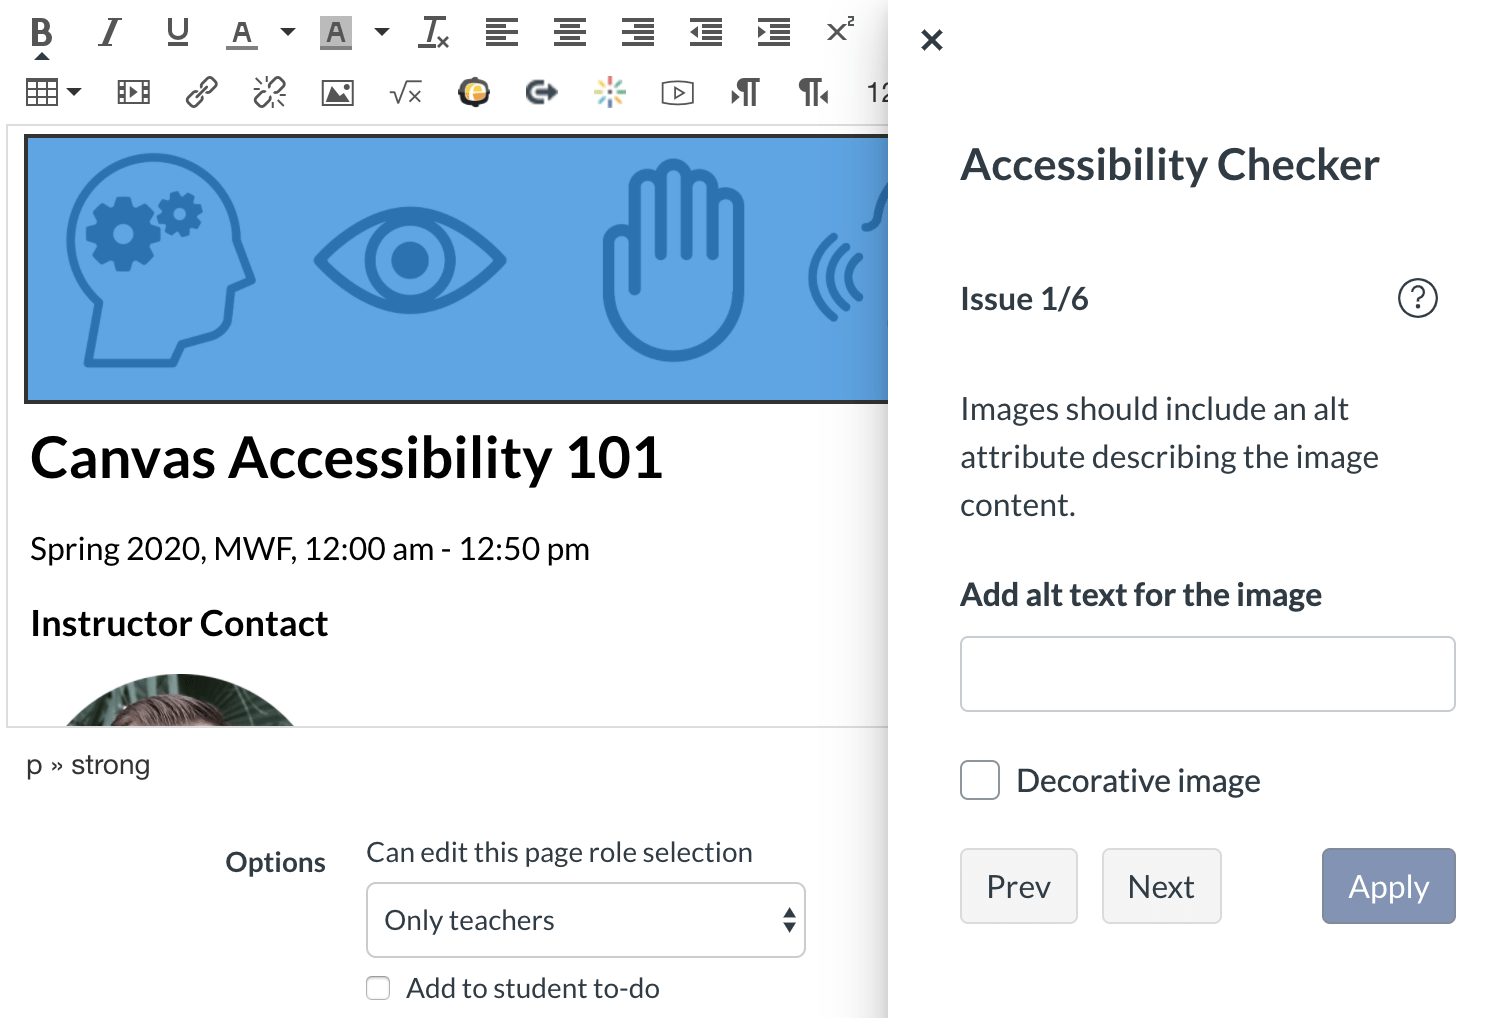
Workshop: Accessibility in Canvas

We will discuss how to apply the “low-hanging fruit” of accessible design when working in the Canvas rich content editor. We will also review how to use the Canvas accessibility checker.

Register for one (not a series):


Blackboard Ally File Transformer Free During COVID-19

The Blackboard Ally File Transformer enables you and your students to convert course files into a variety of different formats including:

  • PDFs with Tags and OCR
  • Audio
  • HTML
  • Electronic braille
  • ePub
  • Beeline Reader

The file transformer has been free to use since April 1, 2020. For more information, see Blackboard’s press release.

Universal Design for Learning

Providing course files in multiple formats gives students more flexibility to choose how they engage with your content and learn.

For example, imagine you have a text-heavy document or article that you need your students to read. With Ally, students can convert the document into an MP3 that they can play in their earbuds while they walk around campus or while they travel home for the weekend. Or, they can convert the same document into an ePub format for easier reading and note taking on their iPad.

Example, PDF to MP3

In this example, I uploaded a tagged PDF to the Blackboard Ally File Transformer and selected Audio as my output, then I downloaded an MP3 file.

Select a File to Upload Select an Alternative Format
Drag and drop or use the 'Browse' button to select a file to upload. Select an alternative format including HTML, ePub, Electronic Braille, Audio, and BeeLine, then select 'Download.'

Check out the MP3 Version and original PDF embedded below.

MP3 Version Converted from Ally

Original PDF uploaded to Ally

Loader Loading...
EAD Logo Taking too long?

Reload Reload document
| Open Open in new tab

Download

Accessible Live Presentations in Zoom

Following up on last week’s post about automatic speech recognition (ASR) captions and transcripts in video recordings, this week we’re talking about ASR in live presentations.

You might recall that Zoom uses ASR to transcribe and caption videos recorded to the cloud only. So what can you do when you’re presenting during live synchronous class meetings, lectures, and webinars with Zoom?

We recommend using one of two presentation applications available to members of the Rice community. Both applications include live ASR:

PowerPoint 365 Live Captions

Either create your presentation in PowerPoint 365, or upload an existing file from your computer.

When you launch the presentation, select the ‘Use Subtitles’ button in the presentation toolbar to activate real-time captions.

PowerPoint slideshow toolbar with 'subtitles' button and other presentation options.

Google Slides Live Captions

Create your presentation in Slides, or upload an existing file. You’ll need to convert uploaded files to the Slides format to use live captions.

When you launch the presentation, select the ‘Turn on Captions’ button in the presentation toolbar.

Google Slides slideshow toolbar with 'Captions' button and other presentation options.

Important Notes

  • Use PowerPoint or Slides ASR if you do not already have a live captioner assisting you.
  • As an alternative to ASR captions, you can assign someone like a co-teacher, TA, or student to type closed captions in Zoom during live meetings.
  • If you have students who need accommodations, or if you’re hosting a webinar that includes a wide audience across the Rice community and beyond, please contact the Disability Resource Center to learn more about setting up a vendor to provide professional real-time captions.
  • Warning: Recording the presentation with live ASR captions means that the captions will be open (burned into the video) on the recording. The recording will contain its own separate closed captions, which means there will be two sets of captions on the same video.
    • Consider downloading the video file and cropping out the open captions with iMovie (mac) or Video Editor (Windows). You can then re-upload the edited video file to Kaltura where it will be automatically re-captioned.

Additional Resources

In addition to live captions, the following links have great tips about how you can make your presentations more inclusive.

Quick Guide to Video Platforms and Captions

As the need to move more of our content and communications online increases, pre-recorded and live videos are likely to become a bigger part of your digital toolbox. In online courses, public web pages, and live streaming events, it’s up to you as the content author/host to make sure that your videos include accurate captions.

Some platforms include automatic speech recognition (ASR) of pre-recorded video, though the accuracy tends to fall below the threshold of accessibility and needs some manual cleaning up. If you have a student who requires captions during live class meetings, or if you are hosting a webinar for the Rice community and beyond, please contact the Disability Resource Center to learn more about transcription service options.

The following platforms are used commonly to host and share video content. Use this quick guide to choose the one that’s right for you and your audience.

  • Kaltura
  • Zoom
  • YouTube
  • Vimeo

Kaltura

  • License: Canvas-only
  • Recommended use: Academic
  • Pre-recorded video: YES
  • Live video: NO
  • ASR: YES
  • Caption editor: YES, learn more.

Zoom

  • License: Pro currently available for Rice faculty and staff. Webinar available by request only.
  • Recommended use: Academic and Public
  • Pre-recorded video: YES
  • Live video: YES
  • ASR: YES, Cloud recordings only
  • Caption editor: YES, learn more.

YouTube

  • License: NO
  • Recommended use: Public
  • Pre-recorded video: YES
  • Live video: YES
  • ASR: YES, both live and pre-recorded
  • Caption editor: YES, learn more.

Vimeo

  • License: NO
  • Recommended use: Public
  • Pre-recorded video: YES
  • Live video: NO
  • ASR: NO
  • Caption editor: NO

Because Vimeo does not include automatic closed captions, we do not recommend using it unless you have a detailed process for creating and uploading your own caption files. For more information, see the following ‘Contact’ section.


Contact

For additional questions and support, contact the Digital Information Accessibility Coordinator.

Free Digital Accessibility Learning Resources

COVID-19 is causing us to move more and more of our information, communications, and operations online, so digital accessibility is more important than ever before.

As a community striving for greater access, inclusiveness, and diversity, it’s up to all of us to improve digital accessibility for everyone, including people with disabilities. When we do not apply accessible design principles and leave barriers in our content, we create opportunities for exclusion and inequity, which are counter to Rice’s V2C2 goals.

Take time this summer to learn more about improving digital access. As you prepare for the fall 2020 semester and beyond, be sure to integrate basic concepts of accessible design into your online learning materials, tasks, and assessments.

Check out these FREE learning resources on Digital Accessibility:

Free Courses/Learning Modules

Web Guides about the Low-Hanging Fruit of digital accessibility

These concepts don’t just apply to Canvas; they can be used broadly to the design of all kinds of web content and digital documents. And remember, accessibility is not about perfection, it’s about progress.

For more guidance, please contact the Digital Accessibility Coordinator:

Use the Check Accessibility Tool in Canvas

What is the Check Accessibility Tool?

The Canvas Rich Content Editor (RCE) has a handy button to help you check for and fix common accessibility issues. It’s the button that looks like a person with their arms out.

Canvas 'Check Accessibility' tool icon in the RCE.

You’ll find the RCE and Check Accessibility tool anywhere you create content in Canvas, including:

  • Announcements
  • Assignments
  • Discussions
  • Pages
  • Quizzes
  • Syllabus

What Does it Actually Check?

The Accessibility Checker does a decent job of catching several common accessibility barriers, or what we like to refer to as the “low-hanging fruit.” Although it’s fairly consistent about catching some of the low-hanging fruit, it has it’s limits. It’s a good idea to know a little bit more about what to look for and how to fix it.

It’s good at catching:

  • Missing alternative text (alt text) on images
  • Low color contrast ratios
  • Missing Table Headers and Captions
  • Skipped heading levels

It’s not good at catching:

  • Non-descriptive links
  • Missing headings

It can’t catch:

  • Missing closed captions in videos (Zoom, Kaltura, YouTube, etc.)
  • Files uploaded to Canvas (Word docs, PDFS, PowerPoints, etc.)

How does it work?

It’s pretty straight forward. Just create your content in the RCE, and before you select ‘Save and Publish,” click the Check Accessibility button to open a side panel.

Canvas 'Accessibility Checker' panel showing issue 1 of 6, which is a missing text description for an image .

Each issue is listed, one at a time and you can track the total number of issues. The content related to the issue is highlighted. Each issue contains a brief description and a help link to more resources. Sometimes, the tools needed for fixing the issue are included. Apply your changes, then select ‘Next’ to move to the next issue.

Canvas 'Accessibility Checker' panel with no issues. It contains a graphic of three balloons and confetti.Once you’ve fixed all the issues, you should receive a celebratory message indicating that “no accessibility issues were detected.”

Once you get the hang of it, you’ll be able to avoid these common issues in the first place. You’ll have fewer issues to fix until eventually, you’re designing with accessibility in mind.

But what if I still can’t fix everything?

Don’t sweat it! Just do your best. We’re not looking for perfection, just progress. With that said, please contact the Digital Accessibility Coordinator to set up a brief 30 minute consultation and learn more about accessible design.

Contact


Additional Resources