Just in time for the spring ’21 semester, Zoom has released live automatic speech recognition (ASR) captions for meetings and webinars! That means you no longer have to rely on workaround solutions like Google Slides or PowerPoint 365 as we previously recommended.
To start using live ASR captions in Zoom meetings and webinars, you’ll first need to go to the settings page of your Zoom account.
On the Settings page, select ‘In Meeting (Advanced)‘ in the menubar.
Find the setting labeled ‘Closed captioning‘ and make sure it’s toggled ON.
Next, select the checkbox labeled ‘Enable live transcription service to show transcript on the side panel in-meeting.’ Be sure to select the ‘Save‘ button after making the change.

Note that any changes you make to your Zoom account won’t take effect until the next time you start a meeting or webinar. Any in-progress meetings need to be ended and restarted before the changes are available.
The next time you start a Zoom meeting or webinar you will see a button labeled ‘Live Transcript.’
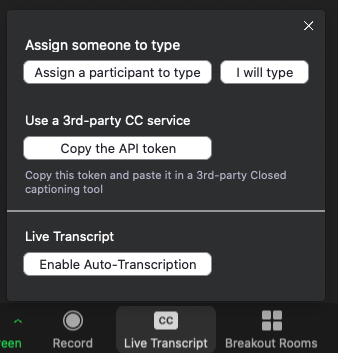
IMPORTANT: You must manually ‘Enable Auto-Transcription‘ each time you start a meeting to ensure that your meeting participants can use the closed captions.
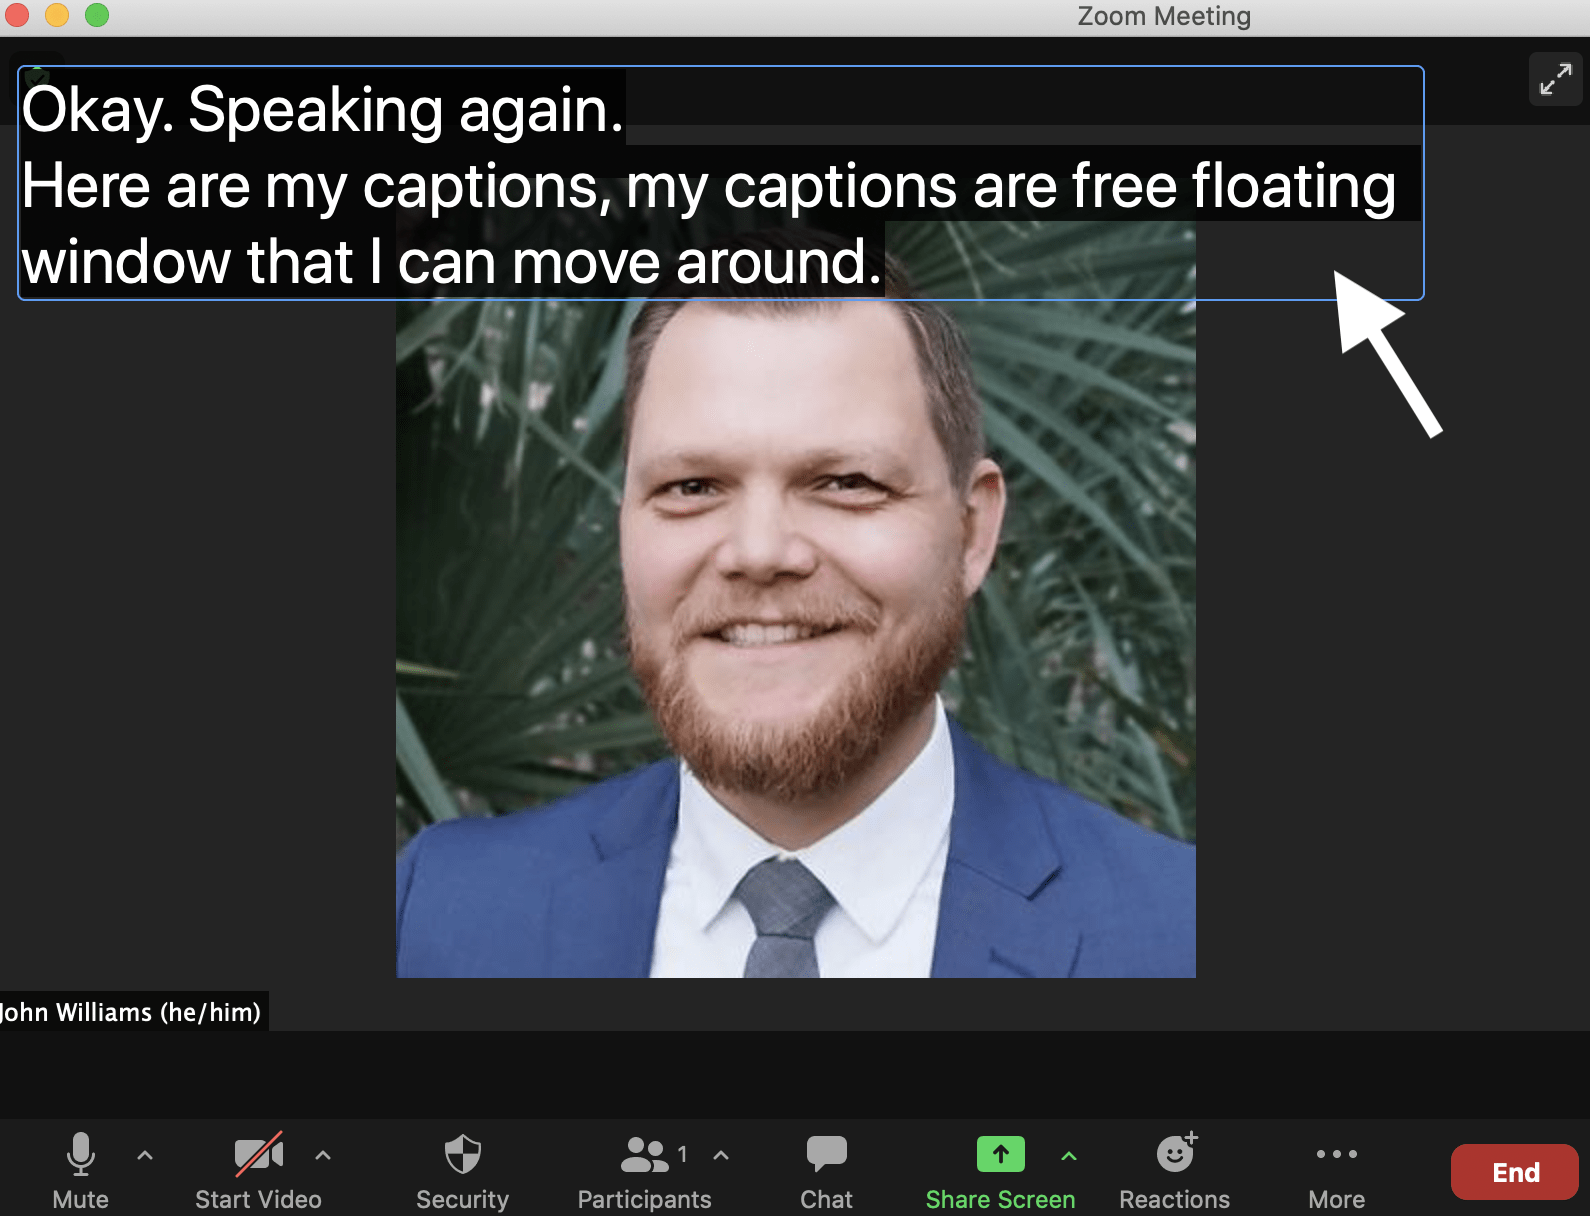
Once the host enables auto-transcription, each attendee can choose to show or hide the closed captions. Everyone can customize the size of caption text by selecting ‘Subtitle settings.’ Each attendee can also drag the caption box to reposition it anywhere in the meeting window.
Live captions are included in cloud recordings and are fully editable too. See our KB article about editing Zoom captions for more information.

Leave a comment